
My First Website Part 4 Plus
4 Mar 2017 • eugene
For the remainder of the the My First Website kata, we'll be using the following process to load and save our code.
1. Pull Changes from Server
- Open Git Bash.
- Change to your repository's directory.
$ cd(make sure we're in the home directory)
$ cd Documents/workspace/dojo2017q1 - Checkout the master branch - where your mentor makes updates for
everyone (notes, images, etc.).
$ git checkout master - Pull the latest changes from the server to your local copy.
$ git pull origin master
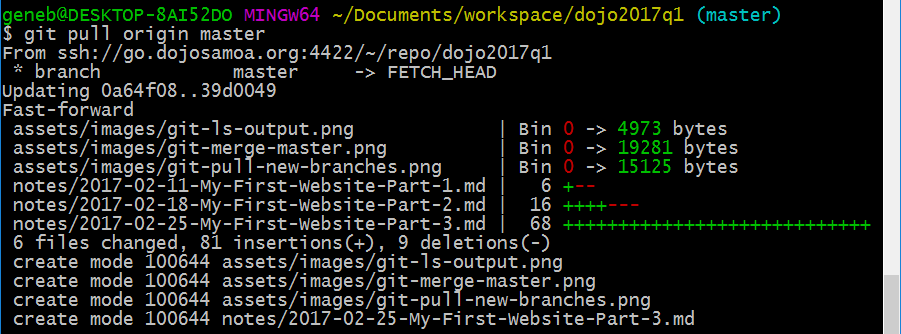
- Now checkout your own branch.
$ git checkout elvis(replaceelviswith your branch name) - Pull your latest code from the server to this laptop, because you probably used a different laptop last week.
$ git pull origin elvis(replaceelviswith your brach name) - And merge in the latest updates from your mentor in the
masterbranch.
$ git merge master - If a Merge message pops-up like that shown, we'll just accept the default message.
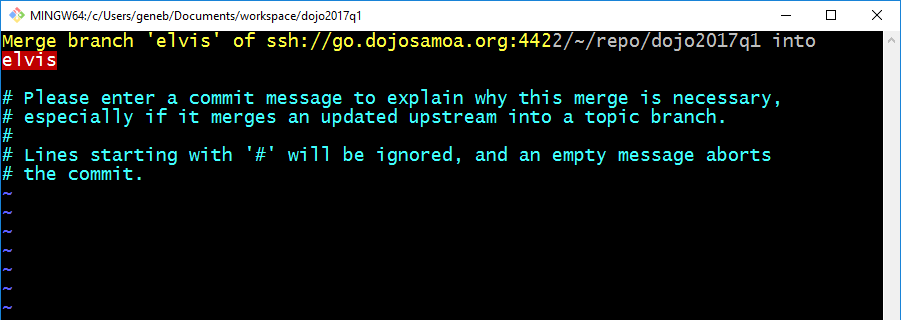
The message is displayed in an old fashioned editor named VI. We'll learn more about VI in another kata. For now, let's just accept this message and type in the following exactly:
:wq
then press[enter]. If the letters don't appear at the bottom of the screen as you type them, press the[esc]key, then try again. - Done!
2. Do Some Coding
Continue your work on the My First Website kata. Get a physical copy from your mentor. Optionally, you can check out the copy in your repository named My_first_website.pdf or download it here.
3. Push Your Changes to Server
- Open Git Bash (if still open from earlier, go to step 3).
- Change to your repository's directory.
$ cd(make sure we're in the home directory)
$ cd Documents/workspace/dojo2017q1 - Review the files that have changed:
git status
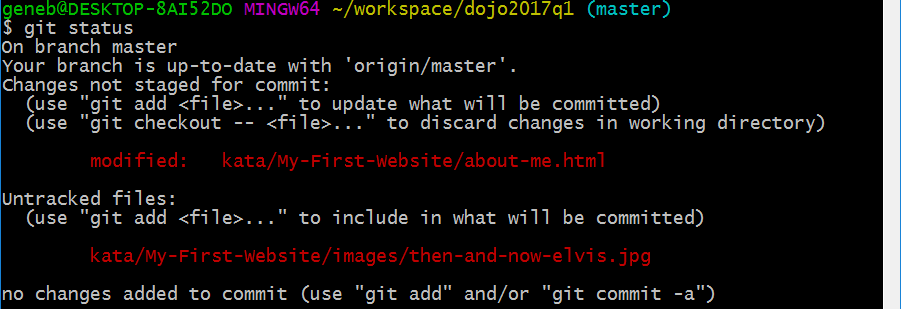
- Stage your files for commit:
git add --all
git status(notice that your files are staged, in-green) - Now commit your changes with a message to help your remember the work you performed today:
git commit -m 'Finished card 3 today!'
(replace the message in quotes after the-mwith your own!) - And push them to the server (replace
elviswith your branch name):git push origin elvis - Done!